Creating Emergency Management
Your Emergency Management Plan lets staff know what to do and who to contact in an emergency. This guide will show you the necessary steps to set this up within your site for each Location.
A clear and thorough Emergency Management plan is crucial in preparing your business to deal with an emergency. It can assist with reducing the damage to buildings, stock and equipment, and the prevention of injuries and fatalities. It helps ensure that everyone knows what to do, where to go and who to contact when an emergency occurs.
The Emergency Management plan can be accessed on Desktop, App or printed as an Emergency Poster. It's important that your staff can access clear and simple to-follow information and instructions in any situation.
Note: Your Access Level may restrict the use of some features.
Emergency Management can only be added or edited on Desktop. A plan needs to be set per Location.
To edit information in Emergency Management, see Editing Emergency Management.
All users can see Emergency Information on the App. See Accessing Emergency Information (App).
There are four sections to be completed to build a Location's Emergency Management Plan:
Important Contacts
- From the left menu, go to Safety Manager > Emergency Management.
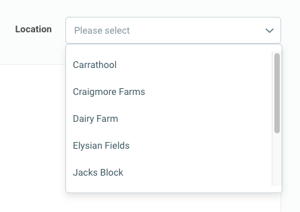
- Select a Location.

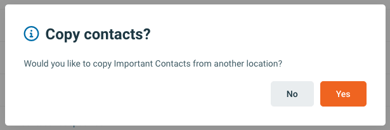
- If the Location does not have any Important Contacts you will be given the option to copy contacts from another Location.
- Select Yes to use Contacts from another Location. Select a Location from the Dropdown and click Continue.
- Select No to add in new Contacts.

- If the Location does not have any Important Contacts you will be given the option to copy contacts from another Location.
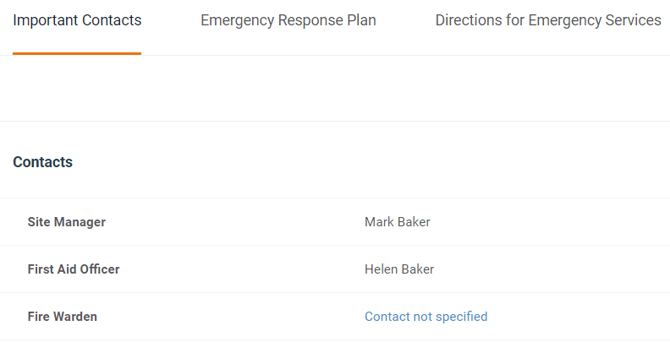
- Click Contact Not Specified to add details.
- Site Managers must be an Active site or Management Portal user. Names are pre-filled with available users. A Management Portal user must have a contact number on their profile to be selected.
- First Aid Officers, Fire Wardens & Traffic Wardens can be an selected from an Active site or Management Portal user, or manually entered by selecting Other - Not in List. A Management Portal user must have a contact number on their profile to be selected.
- All other Contact Types require a name and contact number to be entered manually.

- Complete the details, and click Save.
If other Important Contacts exist for the location, use Add Contact. They will be available to users in case of an emergency.
Emergency Response Plan
- From the left menu, select Safety Manager > Emergency Management.
- Select a Location.
- An Emergency Response Plan needs to be created for each Location.

- An Emergency Response Plan needs to be created for each Location.
- Navigate to Emergency Response Plan and click Add Emergency Response Plan.
- The Emergency Response Plan needs to provide short and easy-to-follow information. It should list information about who to contact, what to do and where to go in the event of an emergency.
- Images, videos and external links can be included, but won't be available in areas with no internet connection.
- Click Save.
Directions for Emergency Services
- From the left menu, select Safety Manager > Emergency Management
- Select a Location.
- Directions for Emergency Services needs to be added for each Location.

- Directions for Emergency Services needs to be added for each Location.
- Navigate to Directions for Emergency Services and click Add Directions for Emergency Services.
- Directions for Emergency Services should be very clear and specific to each location.
Consider including information such as:- Rural Property Address (RPA number),
- Road and property address (including GPS location),
- What3words address,
- Directions from the nearest township, and
- A brief description of any major landmarks/signs that highlight the location of the property.
- Images, videos and external links can be included.
- Directions for Emergency Services should be very clear and specific to each location.
- Click Save.
Important Information
- From the left menu, select Safety Manager > Emergency Management
- Select a Location.
- Important Information needs to be added for each Location.

- Important Information needs to be added for each Location.
- Navigate to Important Information and click Add New Important Information.
- Select an Information Type and fill in the details.
- Consider including information such as:
- Location,
- Type (e.g. Fire Extinguisher type - water, foam, CO2, powder), and
- How and When to use.
- Consider including information such as:
- Click Save.
To add other Important Information, click Add Information and repeat steps 3 - 5.
Each Information Type can be only used once. Use details to provide information about multiple items or locations.