Checklists make it easy for staff to respond to questions, whether it’s for Pre-Starts, Toolbox Talks, or Competency Assessments - to name a few examples! Create your own or use the Template Library, then attach them to your Inventory or Tasks.
Note: Your Access Level may restrict the use of some features.
Checklists can only be built on Desktop.
Create a Checklist by:
Checklists Fields and Options
Checklist Elements
Checklists are built using two types of fields: Content and Response Elements.
- Content Elements includes being able to ask a question, provide information or instructions, or format the Checklist, among other Content Elements.
- Response Elements includes allowing the user to answer a question, upload a file, select an option or create a task, among other Response Elements.
For more details, see Using Checklist Elements.
Conditional Logic
Checklists can also use Conditional Logic to have Response Elements appear, based on a rule. For example, if something is not safe for use, a user can be required to provide details, or create a task. If marked safe for use, these fields wouldn't appear.
For more details, see Using Conditional Logic.
Creating a Checklist from a Template
- From the left menu, navigate to Documents > Checklists.
- Select Template Library to use a Safe Ag Systems Template, or Company Templates to use a Management Portal template. Not all sites will see Company Templates.
- Click the Title to review the Checklist, then Use Template.
- To edit the Checklist before publishing, select Customise. To publish with no changes, select Publish. If selecting Publish, go to Step 7.
If needed, update the Title and add a Company Document ID.
- Click the pencil
 to edit an existing element. When done, click Save.
- To add a new element, drag and drop the element from the right hand side and release where the field needs to sit. Add in the required fields, and press Save. For more details, see Using Checklist Elements.

- Once all changes are made, click Preview to review the Checklist before publishing.
- Use the phone, tablet or desktop icons
 to see how it'll appear on different screen sizes.
 - Select between View mode and Update mode. Update mode will allow the Checklist to be tested as if it was live - a great way to test Conditional Logic.
- Use the phone, tablet or desktop icons
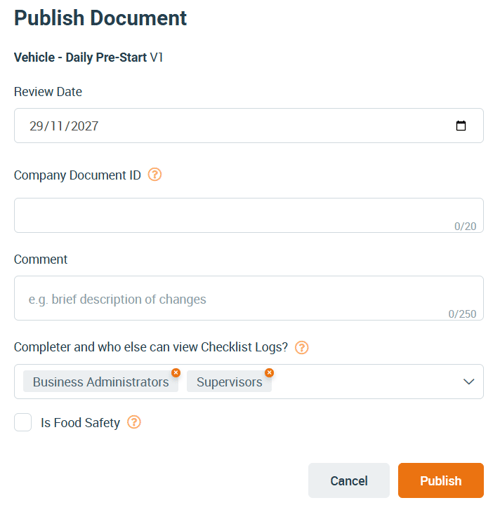
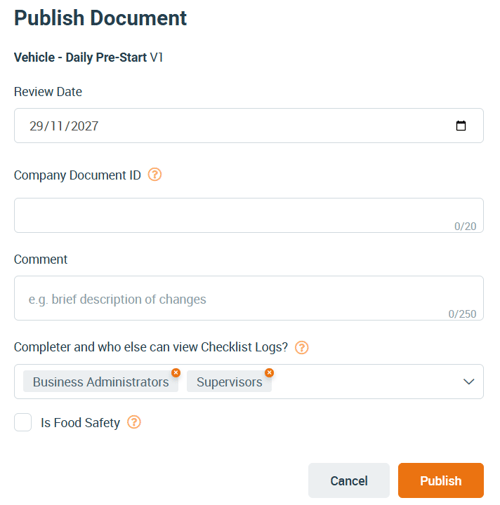
- Click Publish and complete the required fields.
- Set access to the Checklist logs by selecting Access Levels under Completer and who else can view Checklist Logs? This will allow users with those Access Levels to see completed Checklist logs, even if they didn't complete it.
- Click Publish to make the Checklist live.

Building a New Checklist
- From the Left Menu navigate to Documents > Checklists.
- On the Published tab, select Build New.
- Add a Title and if needed, a Document ID, click Next.
- Drag and drop an element from the right hand side and release where the field needs to sit. Add in the required fields, and press Save. Repeat as needed.
For more details, see Using Checklist Elements.
- Click Preview to review the Checklist before publishing.
- Use the phone, tablet or desktop icons
 to see how it'll appear on different screen sizes.
 - Select between View mode and Update mode. Update mode will allow the Checklist to be tested as if it was live - a great way to test Conditional Logic.
- Use the phone, tablet or desktop icons
- Click Publish and complete the required fields.
- Set access to the Checklist logs by selecting Access Levels under Completer and who else can view Checklist Logs? This will allow users with those Access Levels to see completed Checklist logs, even if they didn't complete it.
- Click Publish to make the Checklist live.

What's Next?
Attaching Checklists to Inventory
